


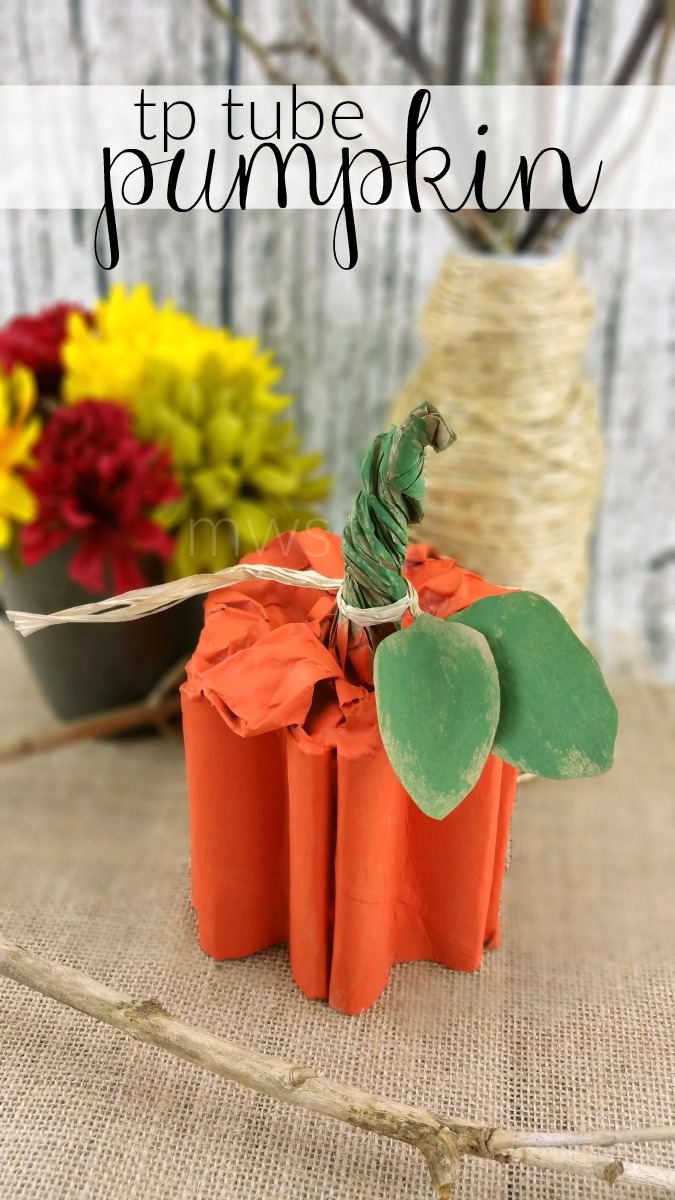
Toilet Paper Tube Pumpkin Craft
This adorable Toilet Paper Tube Pumpkin Craft is perfect for Fall decorating! My kids had so much fun making them and got such a giggle that they were made from toilet paper rolls!

This meme is hilarious (share it on Facebook here) – it’s about toilet paper rolls of all things, but it’s so true, especially when it comes to crafts!

You never know when you might need them for something creative and fun, like making these toilet paper tube pumpkins!
Supplies:

- 2 Lunch Size Paper Bags
- Scissors
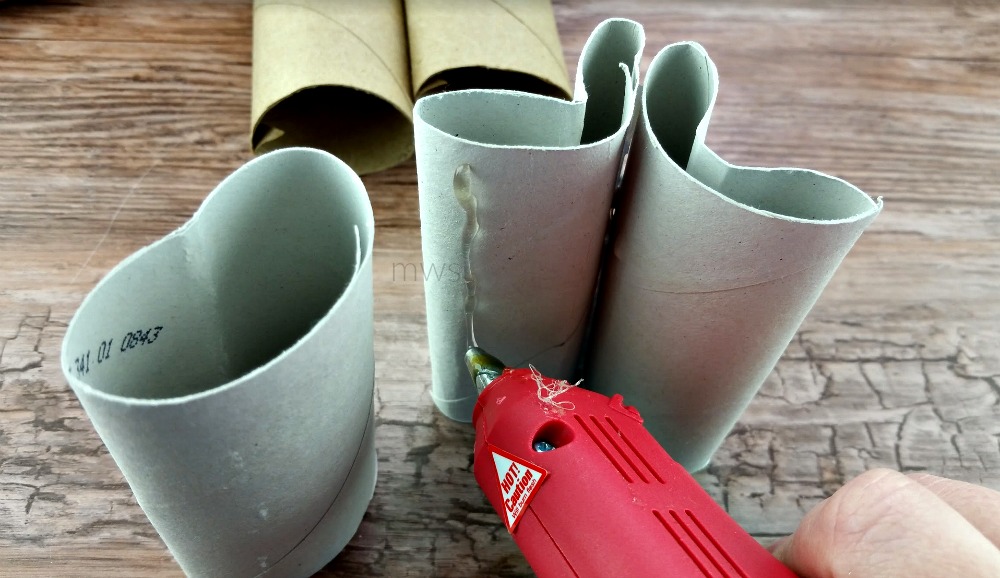
- 7 TP Tubes (or more if you want a larger pumpkin)
- Hot Glue Gun
- 3-4 Glue Sticks
- Orange Craft Paint
- Green Craft Paint
- Paintbrush
- Natural Raffia (about 10 inches)
Directions:
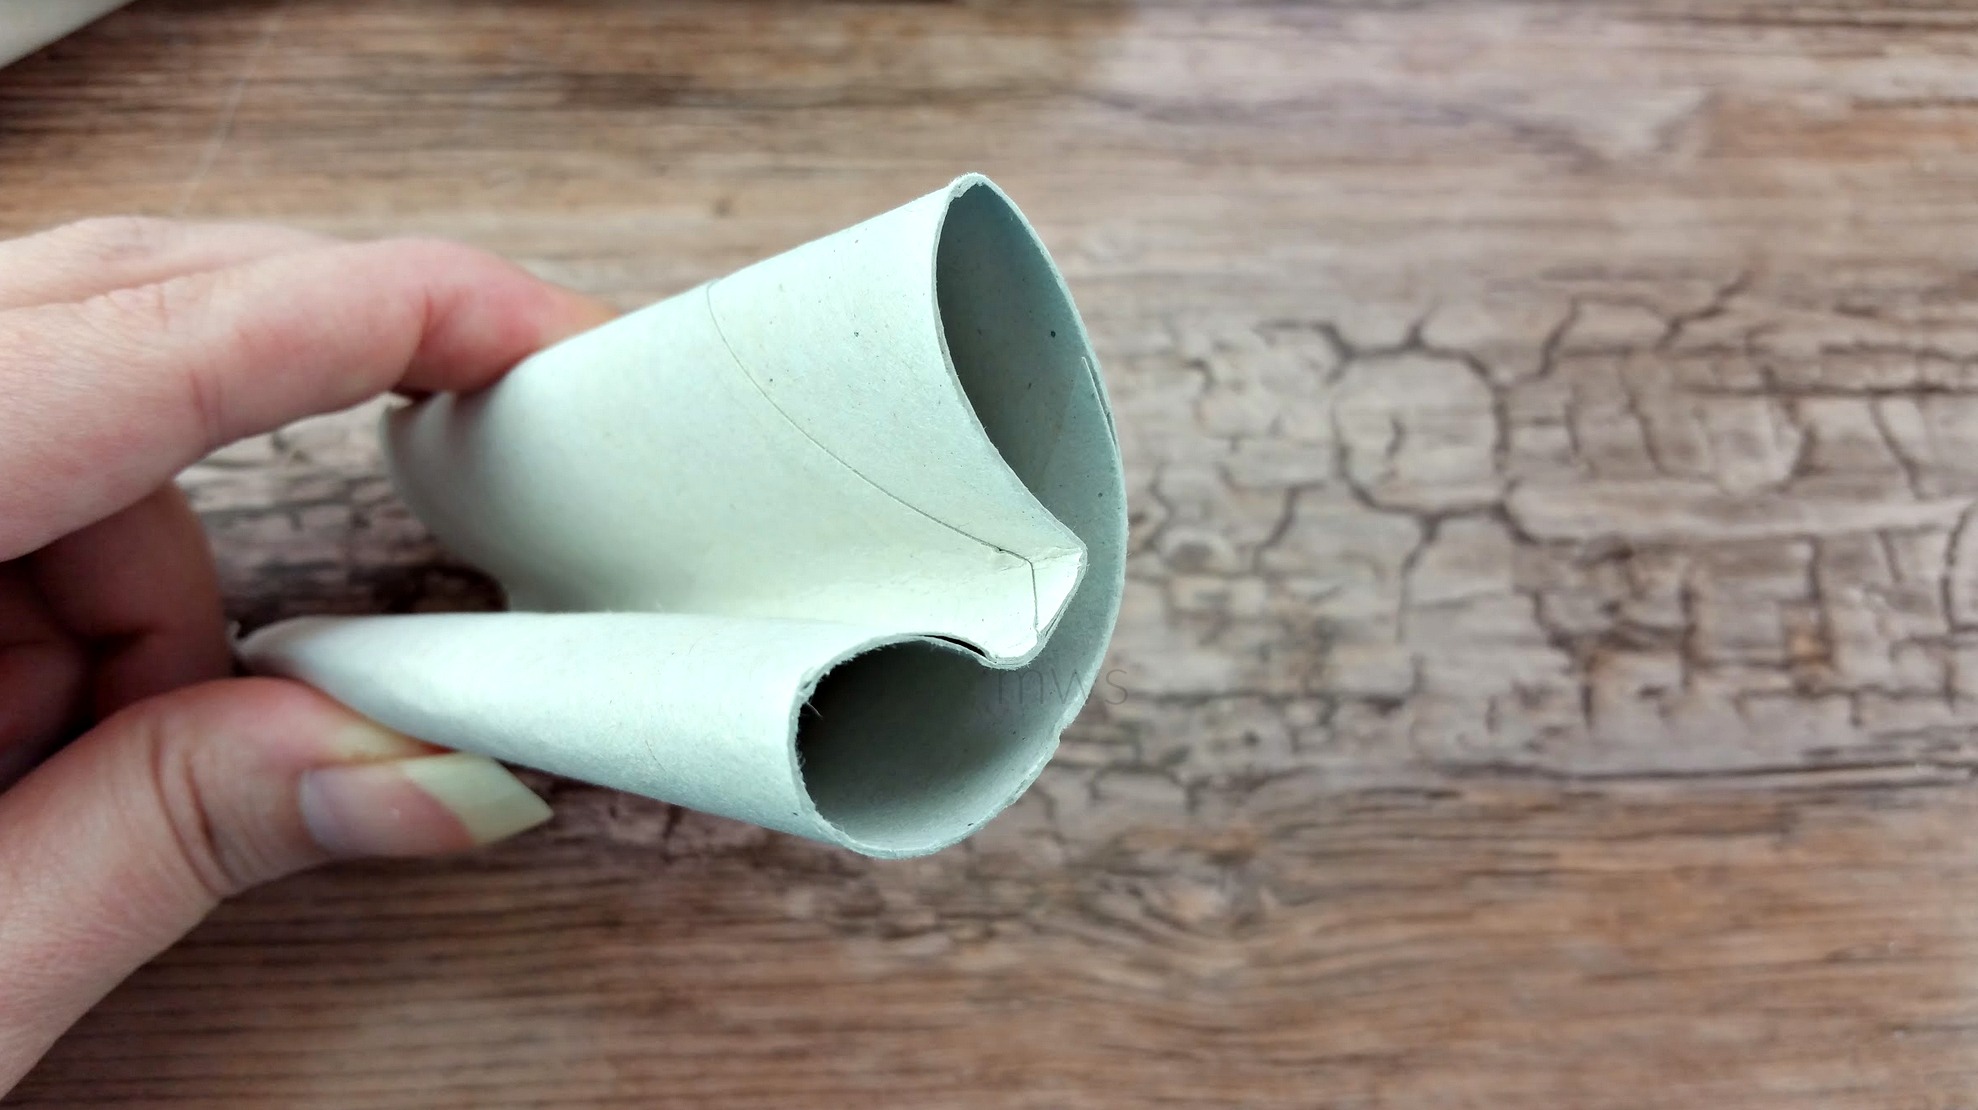
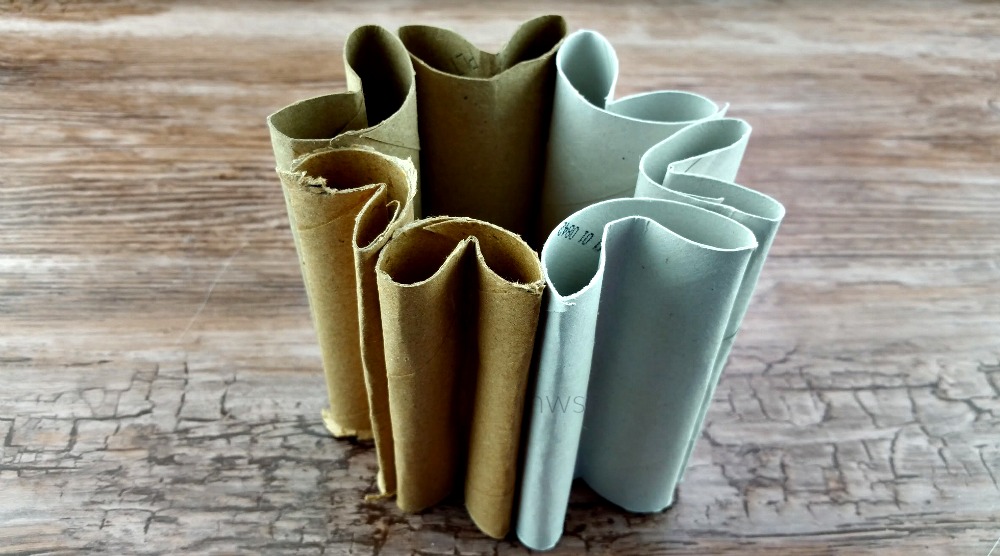
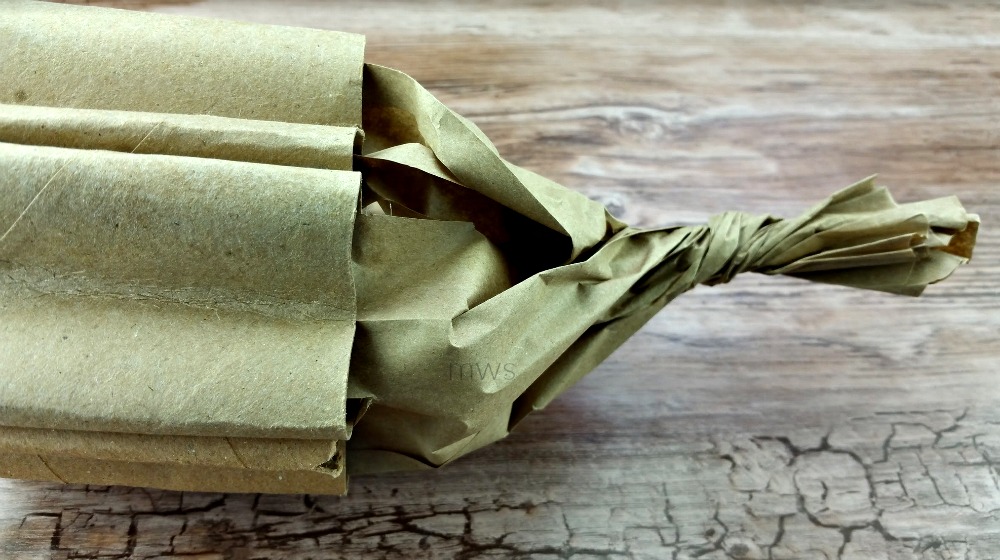
Start by folding the tubes in half by length. Then using the hot glue gun, glue the tubes together putting the flat side to each other
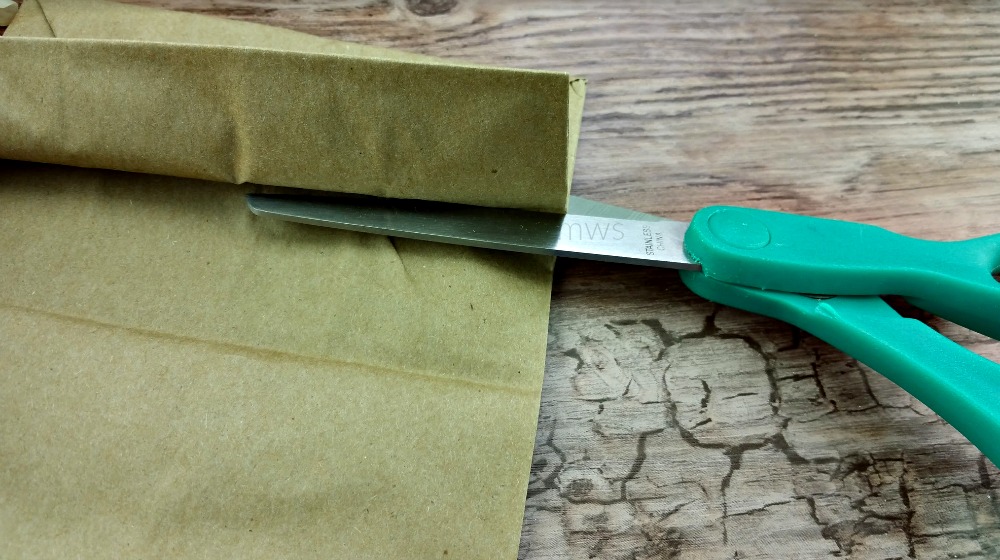
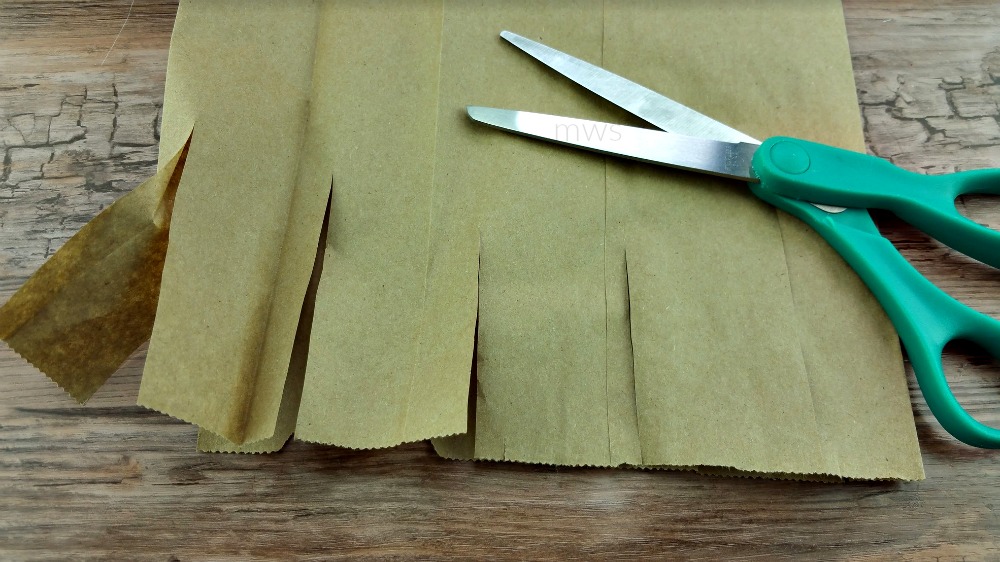
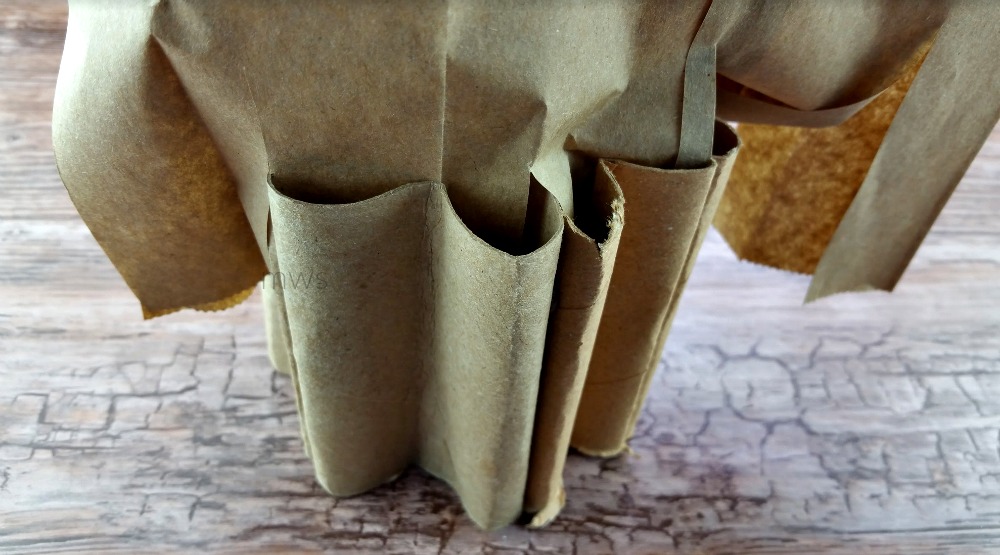
Next, cut the bottom part of the bag off of one bag. I cut right where it folds over. Then make about one and half inch wide slits at the bottom of the bag. You want each slit to be about 3 inches long. Then tuck those strips into the tops of the tubes. You will need to put a few of them with two strips in one tube. Using the hot glue, put a small dab of glue on the inside of the bags at the tubes. You want it to stay in place and not pull out.
Now holding the bag in one hand a few inches from the tubes, twist the bag with the other hand. Then push in toward the tubes. If it does not want to stay to the tubes, use a few dabs of hot glue to hold it in place.
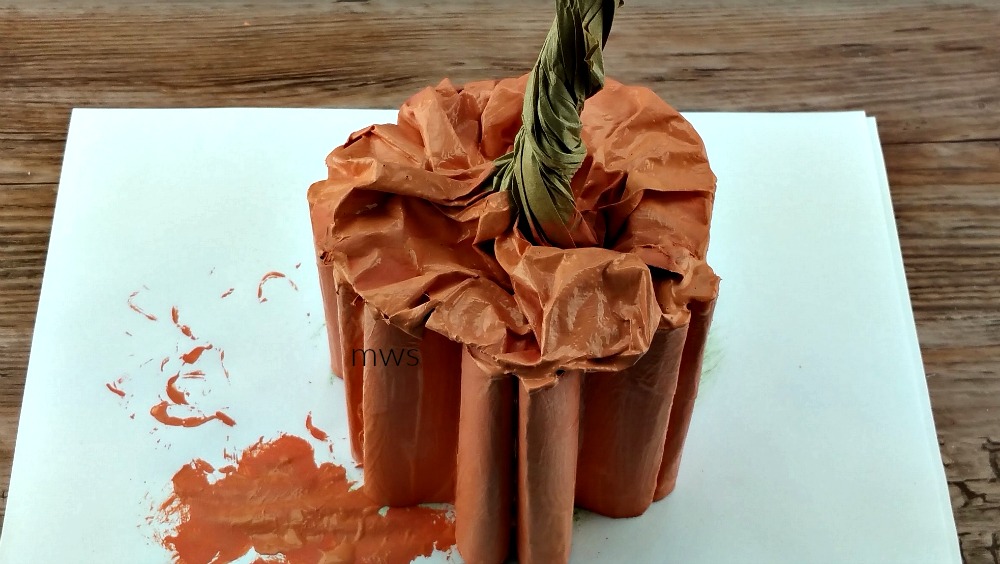
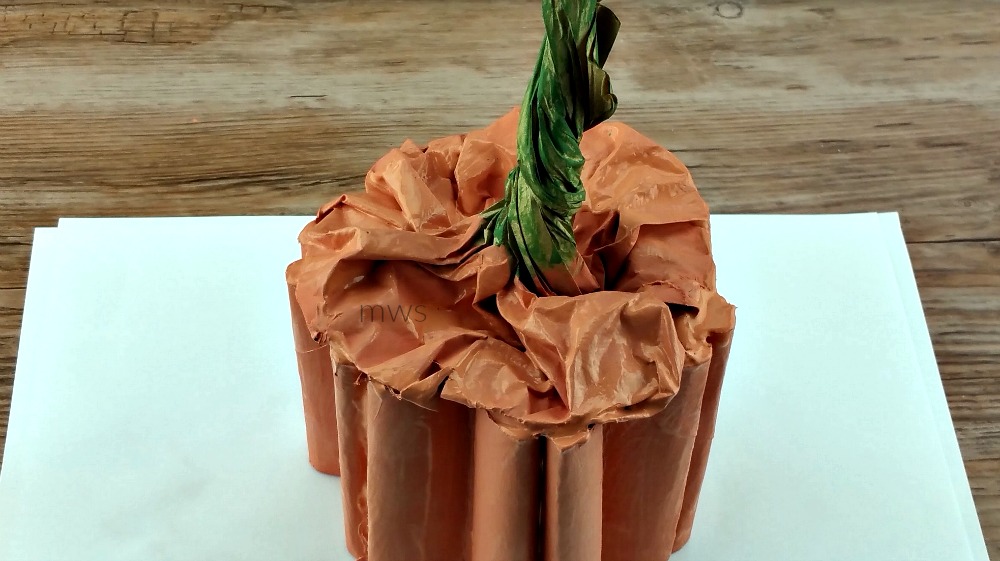
Now give the whole outside of the tubes and the top flat part of the bag a coat of orange paint. Depending on the color you want, you may need to allow to dry and then coat again. Be sure to get the paint in all the folds, but leave the stem brown. Using the green paint, go over the stem part of the bag. You do not have to get it in all the folds unless you want it to be solid green. I liked the two-tone look of mine by just lightly hitting it with green. Set it aside and allow to dry.
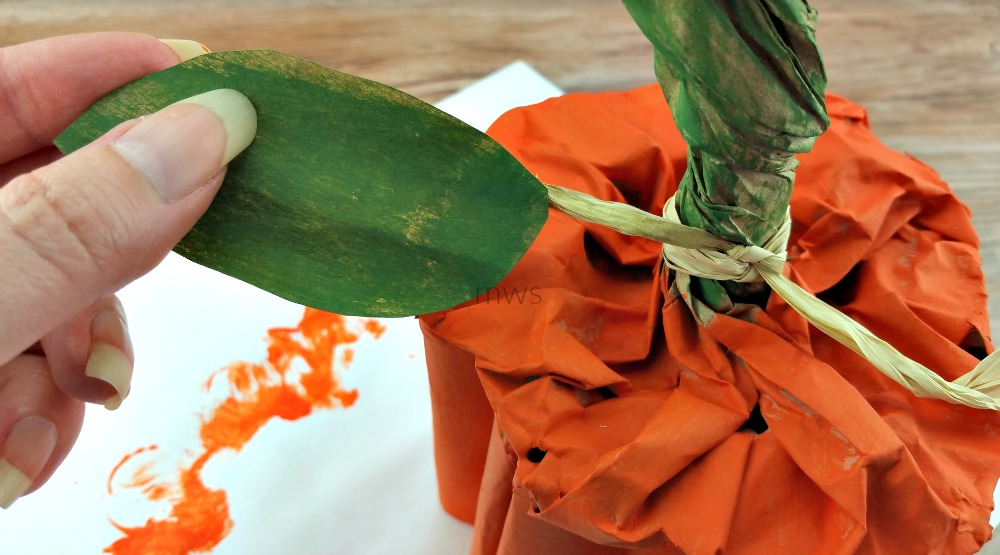
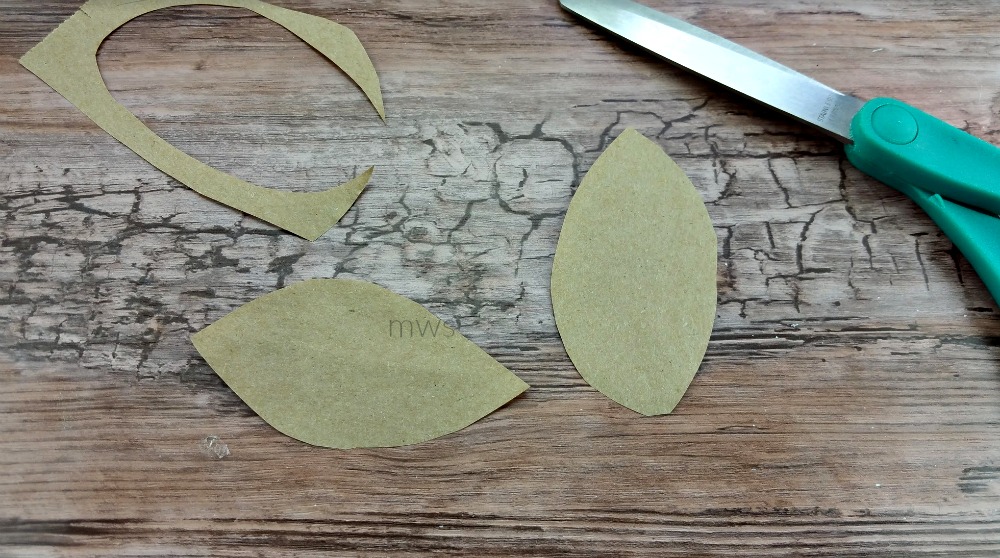
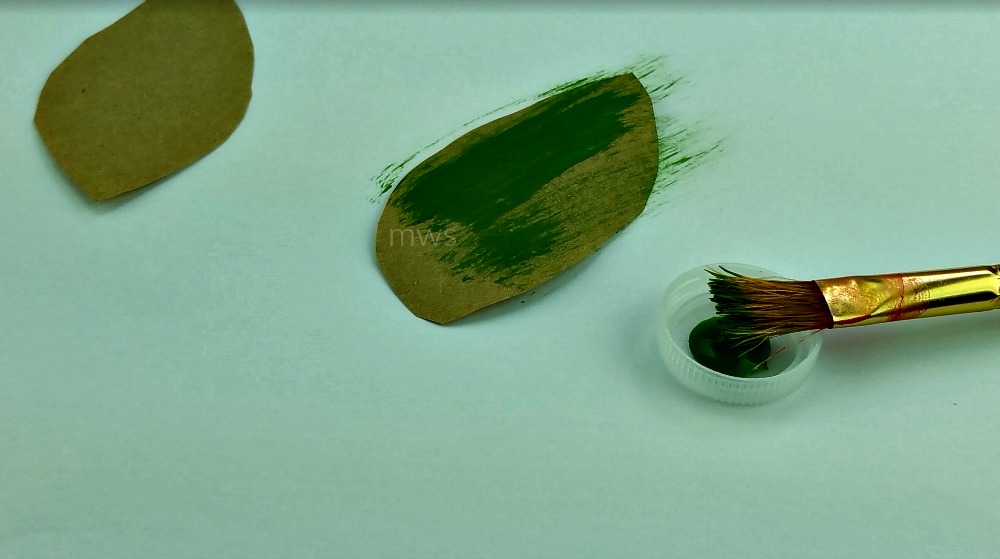
Using the other paper bag, cut out two leaf shaped pieces. Then give them a coat of the green paint. Again, I did the same with these as I did the stem, leaving some of the brown bag showing.
After everything is dry, tie the string around the stem of your pumpkin. Then on one end of the string, glue the leaves in place, overlapping them slightly and you are done!