

Previous Post
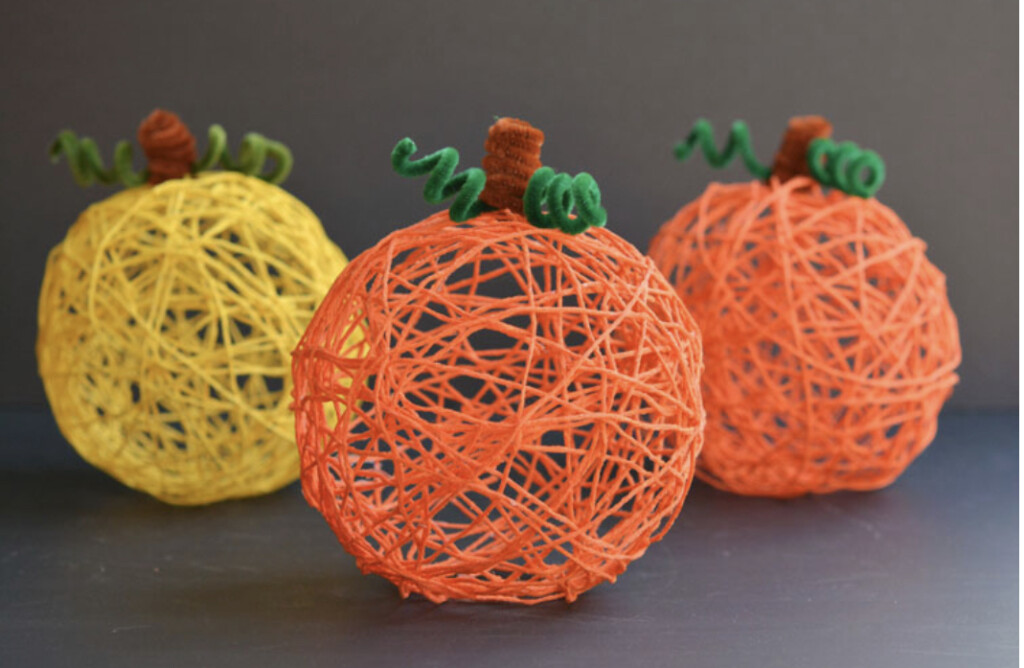
DIY Yarn Pumpkins
Posted on September 24, 2023 by Lasonja
Fall is finally here!!! And that means pumpkins are appearing everywhere…In your homes, your yards, and even in your pies. This DIY craft is so easy and it only requires a few supplies. This is a great craft if you are looking to decorate your home without breaking the bank or if you want to keep the kids entertained.
Supplies:
- Orange Yarn or Yellow Yarn or Red Yarn
- White Glue
- Balloons
- Pipe Cleaner (Brown and Green)
Equipment:
Directions:
Step 1: Gather your supplies.

Step 2: Prepare the balloon and glue
- Blow up 12″ balloons about half full. The bigger you blow the balloons, the more yarn you’ll need.
- Cut out about 21 pieces of yarn about 36 inches long. If you make your pieces of yarn too much longer than that, they’ll get tangled when you soak them in the glue.
- Pour the glue into a small bowl. It takes about one full 2-ounce bottle of glue per yarn pumpkin.
- Tie one of the pieces of yarn to the end of the balloon.
Step 3: Dip yarn and wind around the balloon
- Dunk one of the pieces of yarn into the bowl of glue, and swirl it around gently with a plastic fork to get it completely covered with glue.
- Hold the end of the piece of yarn with your fingers, then gently run it between the tines of a plastic fork to remove the excess glue.
- Take the glue-covered yarn strand and press the end down and wind it around the balloon, making sure to press down the ends of the yarn to secure them when they’re in place.
- Repeat with the remaining pieces of yarn.

Step 4: Allow to dry
- When you’re done, find somewhere to hang the yarn-covered balloons to dry.
It takes about 24 hours for them to dry.

Step 5: Remove the balloon
- This is CRITICAL. You need to make sure you press your fingers down under the yarn to detach the glue from the balloon – around the entire surface of the balloon.
- Make a very small hole in the balloon close to where the knot is (it won’t pop if you cut it near the knot). You want the air to leak slowly so you can detach any yarn that you might have missed as it shrinks.
- Then, pull the deflated balloon out through one of the openings in the yarn

Step 6: Add pipe cleaner stem and tendrils
- Make the pipe cleaner stem and vine by wrapping the pipe cleaners around your baby finger.
- Your yarn pumpkin is complete!

Next Post
Written by

More Military Life Posts

Fit in 15: Core in a Hurry
Let’s talk core! Your core is more than just your abs, it’s your power center....


