

Previous Post
Get Your Brew On: the Wort, the Yeast, and the Bottles
Posted on September 30, 2025 by Kevin Findley
Last time with Get Your Brew On, I provided all the ingredients and equipment you need to create a tasty beer from scratch. Now, let’s brew!
Here are the steps and the timeline for putting it all together:
- Put the specialty grains into a grain bag. Make certain to have a bag large enough so the grains are not packed too tightly. This allows the water to flow freely through the bag. Secure the top of the bag to the side of the brew pot so the bottom of the bag does not touch the bottom.
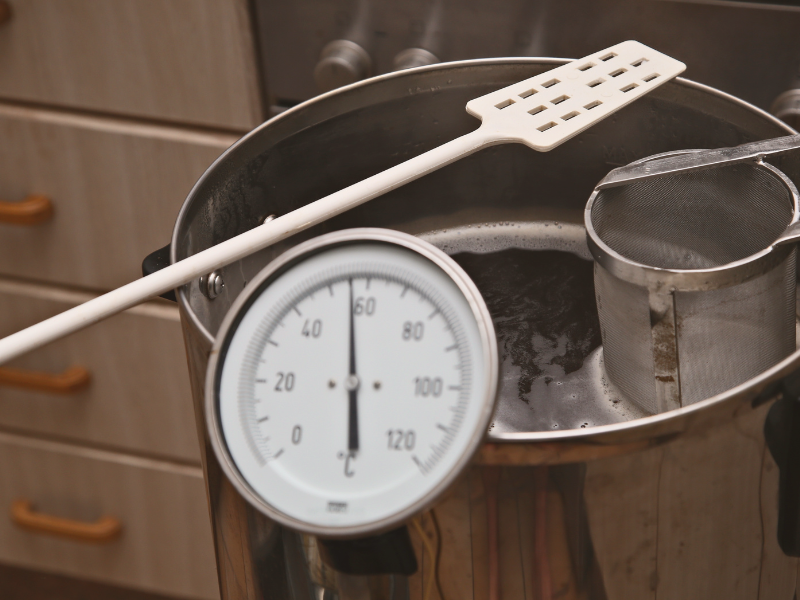
- Add 2 1/2 gallons of water and place the brew pot on the propane burner. Heat to a near boil (160°F). Once the temperature reaches 160°F, turn off the heat and let the grain steep (soak) for 30 minutes.
- Remove the grain bag and drain it completely into the brew pot. Be sure to wash your hands before touching the grain bag.
- Stir in the Briess Rye extract slowly and give it time to dissolve thoroughly. Turn the burner back on and bring to a boil (212°F).
- Place the 0.5 oz Summit hops in a small hop bag and add it to the pot. Boil for 40 minutes.
- Add 1.0 oz of Spalt hops to another bag and add it to the pot. Boil for 5 minutes.
- Turn off the burner, place the second 1.0 oz Spalt hops into a bag, and let it steep for 5 minutes.
- Congratulations! You now have the wort which will ferment into tasty beer!
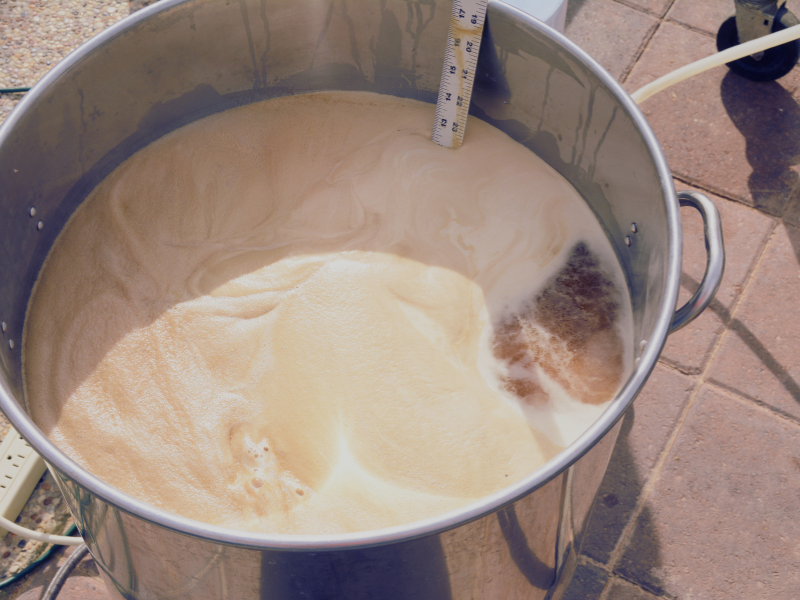
- Remove all hop bags and cool the wort by placing the chiller into the pot. Run cold water through the chiller until the temperature drops to 100°F. Add cold water until the level reaches 5 ½ gallons.
- Remove any large particles with the spoon and then transfer the wort into the Fermenter using the siphon and food-grade tubing. Once the wort has cooled to below 85°F, pitch the yeast into it, spreading the yeast evenly over the entire surface of the wort. Set the Fermenter in a cool place (temperature should be about 70°F). Allow fifteen days for the yeast to complete its work.
- Once the wort clears (when the remaining particles sink to the bottom of the Fermenter), use the siphon and tubing to transfer it into the Carboy. Be careful not to pull any of the particles into the siphon.
- An alternate method is to use a fermenter with a built-in spigot. This allows you to transfer the wort directly into the Carboy without the need for a siphon and tubing.
- Dissolve the bottling sugar in 1 cup of hot water, then stir it into the wort.
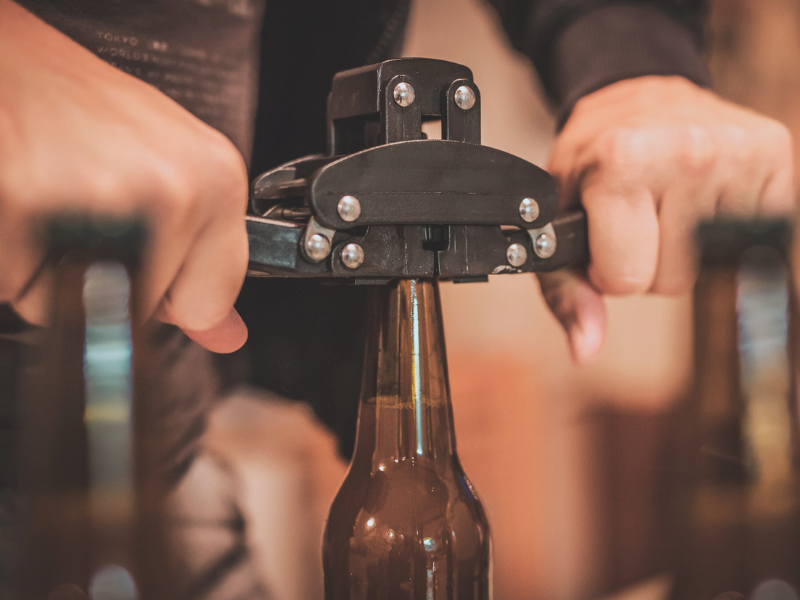
- Use the siphon and tubing one more time (clean and sanitize between uses) to bottle the beer and cap it. Do this slowly, carefully raising it to the level of what you see in a bottle of your favorite beer.
- Do not fill the bottle completely, as you’ll need room for carbonation. A good rule of thumb is to fill each bottle no higher than ¾ of an inch below the top of the bottle. This is why I recommend longneck bottles. Don’t be surprised if you have a bit leftover or one of your bottles is a little short. It means you may have added a bit too much or too little water.
- Capping the beer is easy until it isn’t. If you use a handheld capper, you’ll need a flat surface with a rubber mat that grips the bottle and holds it in place. If you decide on a countertop capper, you should still set it on a rubber mat on a flat surface so the capper doesn’t accidentally move. I’ve used both and had bottles slide across the counter. It results in lost beer, broken bottles, and a lot of cleanup.
- Age the beer for at least 3 to 4 weeks. If the first bottle or two have an extreme hoppy taste, you can continue to age it. Try one test bottle every week until the flavor meets your expectations for the batch.
- Write down every step of the process as you perform it. It’s a good way to keep track of how you do things, and as you progress, you’ll notice that certain actions have an impact on the final product. For example, I eventually noticed that I was allowing the wort to sit for up to ten minutes after it reached the right temperature to pitch the yeast.
- That small additional amount of cooling time affected fermentation. Once I corrected it by prepping the yeast earlier and pitching it immediately, the result was a stronger flavor and a better ‘feel’ overall on the taste buds.
Whew! That was a lot, right…but I have faith that you are going to make some amazing brew in your near future! In our next installment of Get Your Brew On, we will be building our own equipment and creating recipes that match the weather!
Explore More with My Military Lifestyle and Crafts!
Next Post
Written by

More Military Life Posts

The Ultimate Tournament Crunch with DiGiorno Thin Crust Pizza
As we head into the games this month, the tensions are high, brackets might not...


